Installing
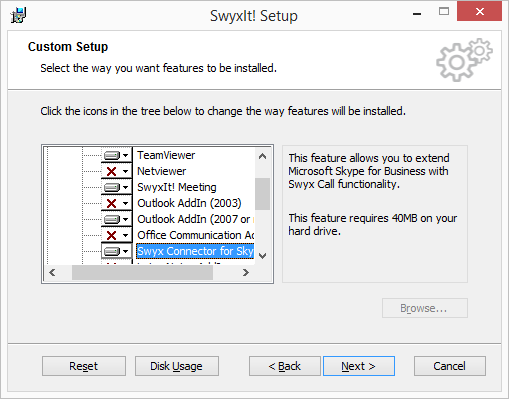
In order to use Swyx Connector for Skype, select the respective component in the feature list during the installation of SwyxIt!. If Swyx Connector for Skype has not been selected during the installation of SwyxIt!, you can also install the component at a later stage.
| Swyx Connector for Skype and the Office Communication AddIn cannot be installed and used at the same time. If you have already installed the Office Communication AddIn, you have to uninstall it in order to use Swyx Connector for Skype ( see How to install Swyx Connector for Skype subsequently:). |
| SwyxIt! is not automatically installed when re-installing or updating Swyx Connector for Skype, if it has not been installed before. After an update, re-start the Setup and select “Modify” in order to start a customized installation. Then, enable the “Swyx Connector for Skype“ feature. |
| In order to use Swyx Connector for Skype, Microsoft Lync 2013 or Microsoft Lync Basic 2013 is required. |
| If SwyxIt! is already part of the auto start group, and Swyx Connector for Skype is installed subsequently, the SwyxIt! auto start link will be replaced by the Swyx Connector for Skype auto start link. |
How to install Swyx Connector for Skype subsequently:
1. Start the SwyxIt! installation wizard and follow the instructions.
2. As installation type, select “Modify”. By selecting this option, you can install components separately.
3. Disable the “Office Communication AddIn” component.
4. Enable the “Swyx Connector for Skype” component and continue with the installation process.