help • 9 Migrate local SwyxWare installation to SwyxON • Export a SwyxWare installation
9.1 Export a SwyxWare installation
Before exporting, make sure that the SwyxWare installation meets the following requirements:
Requirements
*All files and configuration data intended for migration must be located in the SQL database assigned to SwyxWare.
* 
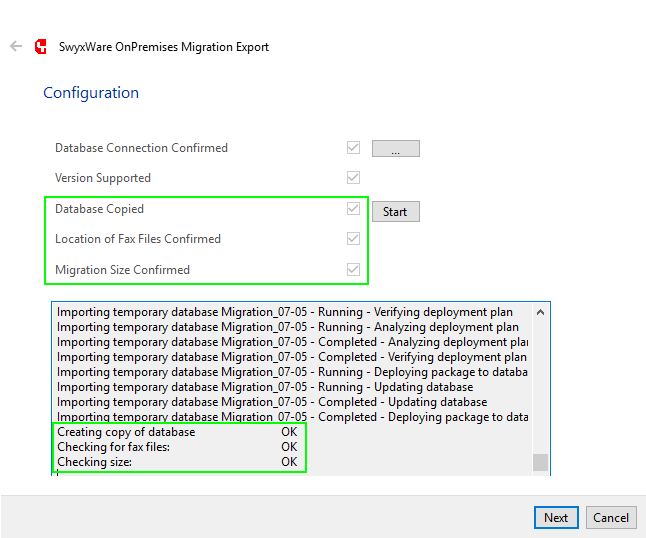
The maximum supported database size for SwyxON import is limited to 1 GB. If your database exceeds this limit, reduce the size of the database by archiving or deleting old files.
 
* 
If you store users' fax documents in the computer file system, migration will not be possible.
Run the configuration wizard again ("Start | Programs | SwyxWare | SwyxWare Configuration Wizard") and select Storing in the database in the Memory location for the files step.
 
* 
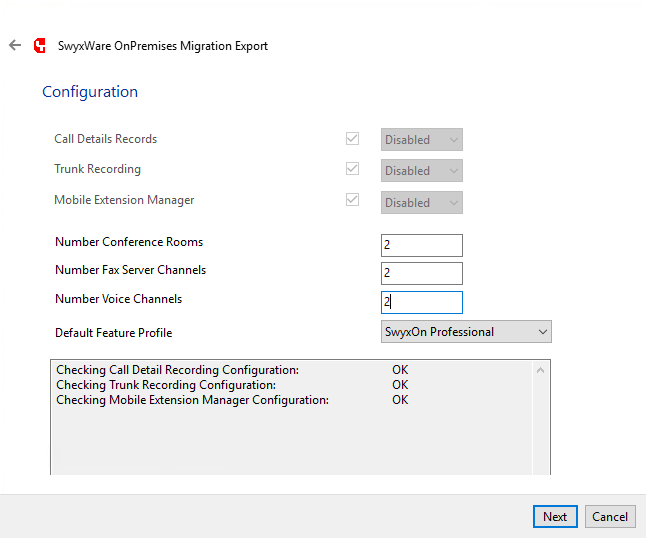
Call Detail Records (CDR) that reside in an external database or in the computer file system are not migrated.
 
* 
The existing trunk recordings (SwyxMonitor) will not be migrated.
 
* 
The Mobile Extension Manager feature is not supported in SwyxON.
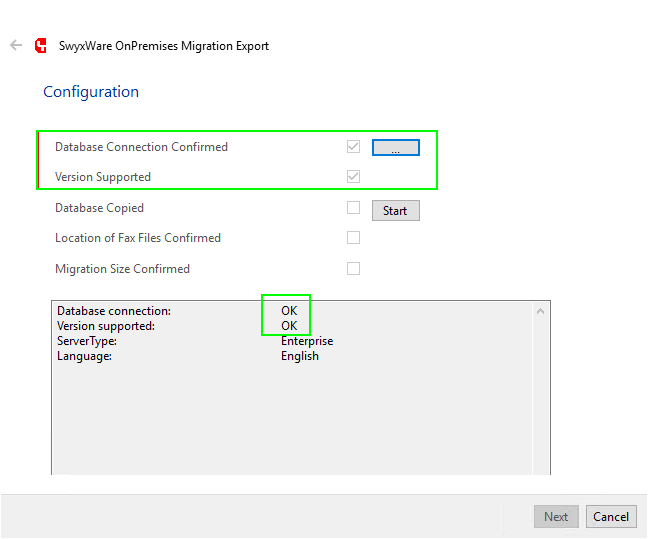
 
*Your SIP provider must support the functionality of SwyxON. Please check the list of supported provider profiles at enreach.com/products/sip-provider.html
*Update SwyxWare to one of the versions that supports migration: v11.52.0.0 / v12.41.0.0 / v13.10.0.0
*If you are using SwyxWare in a master/standby configuration, you must convert a SwyxWare installation that you want to export to a stand-alone system, see help.enreach.com/cpe/latest.version/Administration/Swyx/en-US/index.html#page/help/chap_standby.25.25.html
To export a SwyxWare installation
You have downloaded the file "Cloud.Tool.Export.zip".
1 Copy this file to the computer where SwyxServer is installed and extract its contents to a separate folder.
2 Change to the folder and start "SwyxWareExport.exe".
3 Read the listed instructions again and click Next.
*The connection to the database and the version support are checked:
4 If necessary, enter the SQL account data via the ... Button under Database Connection.
5 Click Start.
*The data is prepared.
6 Click on Next.
7 Select the desired number of conference rooms, fax and voice channels.
8 Select a default function profile to be assigned to all users. (In the next step you can change the function profile for individual users) See also help.enreach.com/controlcenter/latest.version/web/Swyx/en-US/index.html#context/help/online_licensing_$
9 Click on Next.
10 If necessary, select desired users and click Change Feature Profile to assign a different feature profile. For an administrator, you can set "None" as the function profile to avoid unnecessary costs.
11 Click on Next.
12 Name the file you want to export and choose a location in the file system.
13 Click Save.
*The data will be exported. The migration file with .swyxon extension is saved in the specified folder.
14 Click Finish.
You can now proceed with the second step, see 8.4 UC Tenants erstellen
* 
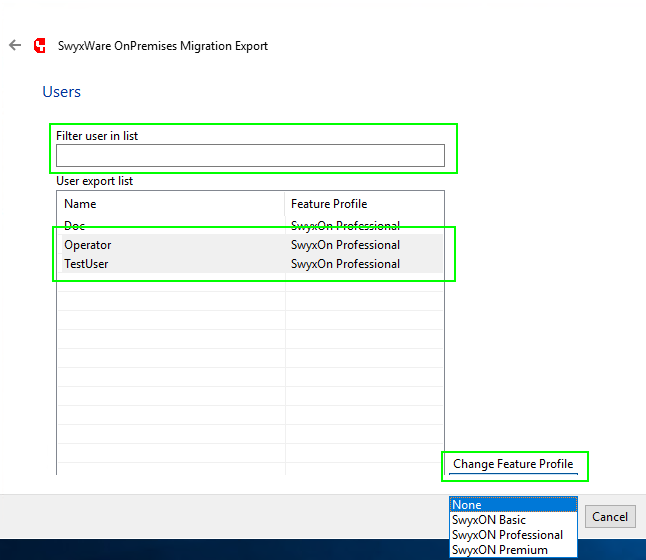
When ordering in Swyx Operator, pay attention to the function profiles you’ve assigned to the users.
 
* 
Once a UC Tenant is created, the administrator and SwyxWare users will receive an invitation to the new system via email. Users can log in with their clients.