With this action, an attempt will once again be made to connect a call to a certain destination number. The caller hears another announcement between the individual attempts. If the line is busy, the caller will hear a busy announcement defined by the system administrator.
Under "Properties", all three tabs "General", "Parameters" and "Connections" tabs are available for this block.
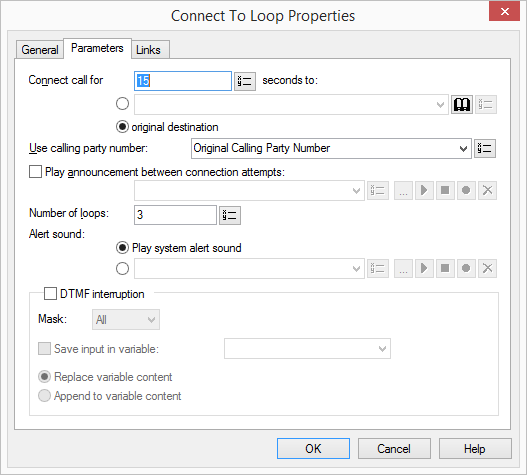
1 Enter the amount of time which should be spent on attempting to reach the target telephone number in the field “Connect call for… seconds” (Timeout). If you enter a “0” here, the call will not be returned to you, but rather the connection attempt will continue “forever”. (Most telephone companies terminate a connection, which has not been picked up, after a certain amount of time, for example, Deutsche Telekom terminates such calls after two minutes).
2 Indicate where the call should be transferred.
The options include a telephone number, a symbolic name (if this has been recorded in the Phonebook) or the original destination. You can also select the telephone number from the Phonebook or from the drop-down list or from a previously set variable.
Additional external numbers can be entered for use with "Parallel Call Signaling". This makes it possible to signal the connected call parallelly on all terminal devices referenced by the entered numbers. The call is made on the device which is first to pick up the call.
| For information on using the phone book and on the subject of "Parallel call signaling", see the SwyxIt! documentation. |
3 In the field "Use for the following number", select the numbers to be signaled upon forwarding. If you select "Original destination of the call", the originally dialled number will be signaled.
4 Define the announcement.
You have several options:

From the dropdown list select a file.
Browse your hard drive by clicking on

.
When searching, you can also choose a file in MP3 format. Upon selection, the MP3 file will automatically be converted into the WAV format and saved in the database on the SwyxServer. The converted files are therefore available for use later. During the conversion process, the Info dialog "Please wait, the file is being converted into WAV format" will open.
Click on

, to listen to the selected file. Click on

to stop playing the file.
To record a new announcement, click on

: You will now be prompted to enter a file name. The “Start Recording” window will appear. Click on “Start” to begin recording the announcement. Stop recording by clicking on
.
To delete the selected file, click on

.
| The WAV files, which the administrator has made available to all users, have the extension “(Template)” in the file name. These templates cannot be deleted. |
5 Define how often an attempt should be made to connect to the destination.
6 Select the ringing sound that should be played for the caller during the connection attempts.
7 Click on “OK”.
The “Connect To Loop” block can be seen on the grid interface and it available for further processing.