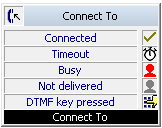
The action „Connect To“ transfers the call to the target telephone number. A time limit (Timeout) limits the time period in which a connection establishment it is tried.
You have the option of playing an announcement (e.g. “your call will be connected”) in the handset instead of a ringing (idle tone).
You define the number in the field "Use for the following number", which in the case of forwarding should be signalled. This can be the number of a user or a group.
Furthermore, in this block you can permit an interruption by a DTMF entry made by the caller. This takes place in the same was as in the block “Play announcement”.
Alternatively, you can activate the checkbox “Proceeding with Call Routing of destination” if the call is to be forwarded to another internal subscriber and the call should be processed according to the rules of this subscriber. In this case, your own set of rules will be ended.
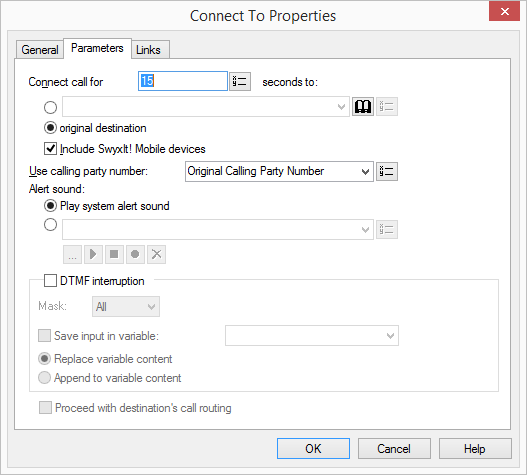
1 Here you indicate where the call should be transferred.
The options include a telephone number, a symbolic name (if this has been recorded in the Phonebook) or the original destination. You can also select the telephone number from the Phonebook or from the drop-down list or from a previously set variable. See also
Variables and System Functions.
Additional external numbers can be entered for use with "Parallel Call Signaling". This makes it possible to signal the connected call parallelly on all terminal devices referenced by the entered numbers. The call is made on the device which is first to pick up the call.
| Only external numbers (e.g. the number of an ISDN telephone or a cellular phone) can be used. If a connection subject to costs is set up while forwarding, then these costs will be charged to you. |
For detailed information on the use of the Phonebook see the SwyxIt! documentation.
2 If you select the field „Include SwyxIt! Mobile devices“ it makes it possible to signal the connected call also on your SwyxIt! Mobile device.
3 In the field "Use for the following number", select the numbers to be signaled upon forwarding. If you select "Original destination of the call", the originally dialled number will be signaled.
4 Enter in the field “Connect call for… seconds to:” the amount of time which should be spent on attempting to reach the destination number (Timeout). If you select “0” here, the call will not be taken back, but irrevocably connected.
| After putting the call through with the value "0" for Timeout, the call is no longer available for further processing. |
5 Define which ringing should be played during connection. You can use the default ringing or select an individual WAV file.
You have several options:

From the dropdown list select a file.
Browse your hard drive by clicking on

.
When searching, you can also choose a file in MP3 format. Upon selection, the MP3 file will automatically be converted into the WAV format and saved in the database on the SwyxServer. The converted files are therefore available for use later. During the conversion process, the Info dialog "Please wait, the file is being converted into WAV format" will open.
Click on

, to listen to the selected file. Click on

to stop playing the file.
To record a new announcement, click on

: You will now be prompted to enter a file name. The “Start Recording” window will appear. Click on “Start” to begin recording the announcement. Stop recording by clicking on
.
To delete the selected file, click on

.
| The WAV files, which the administrator has made available to all users, have the extension “(Template)” in the file name. These templates cannot be deleted. |
6 Define whether and, if the reproduction control is not activated, which DTMF character can be used to cancel the announcement.
In doing so, define whether the character entered should be saved in a variable and whether
the contents of the variable should be replaced, or
whether it should be appended to the contents of the variable.
7 Activate "Proceeding with Call Routing of Destination" if the call should be processed using the Call Routing rules of the destination. In this case, the call is no longer available for further processing.
8 Click on “OK”.
The “Connect to” block can be seen on the grid interface and it available for further processing.