2.2 We Create a Simple Example
This chapter provides a step-by-step description of how the Graphical Script Editor works based on a simple sample script.
The following call handling situation was chosen as an example:
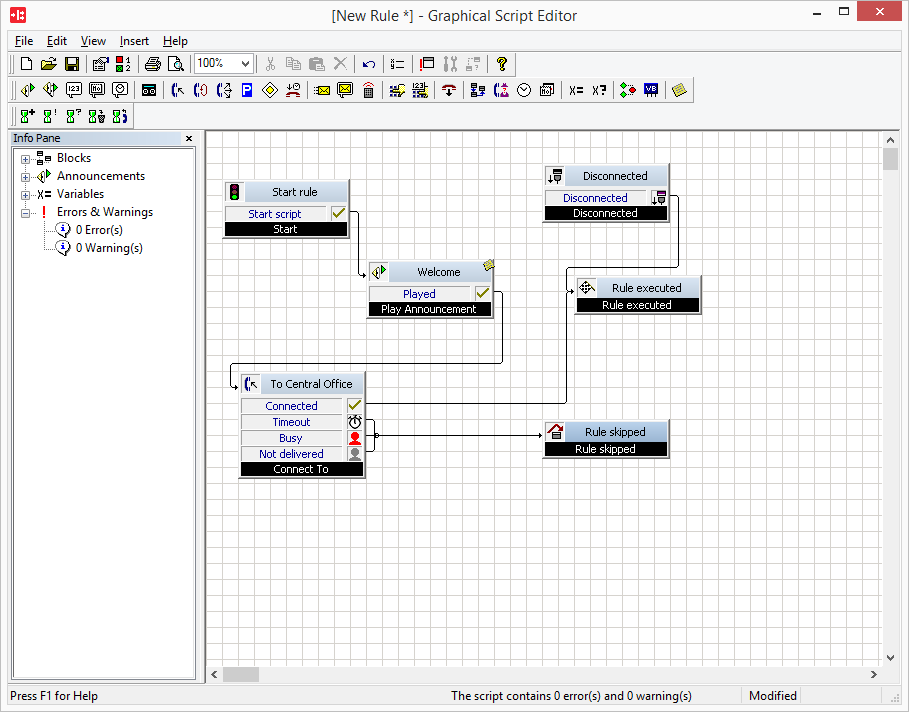
An incoming call is automatically picked up and the caller hears an announcement. After the announcement has been played or if a DTMF tone is entered, the call is forwarded to the switchboard. The call handling is then considered completed.
If the connection is interrupted (e.g. the caller terminates the call), then the call handling is considered cancelled. In this case, it is possible for other rules to be applied by the Call Routing Manager.
All views correspond to the default setting of the Graphical Script Editor.
This is how you create the rule “a simple example”
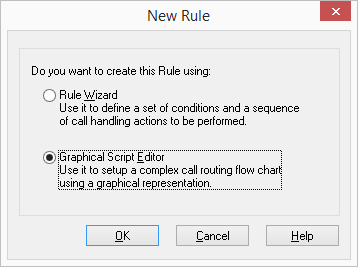
The “New Rule” window will only appear if you have the right to edit rules using the Graphical Script Editor.
See also User Rights.
4 Click on the symbol “Play Announcement”  in the menu bar and click once again on the grid interface of the the Graphical Script Editor to place the block “Play Announcement”.
in the menu bar and click once again on the grid interface of the the Graphical Script Editor to place the block “Play Announcement”.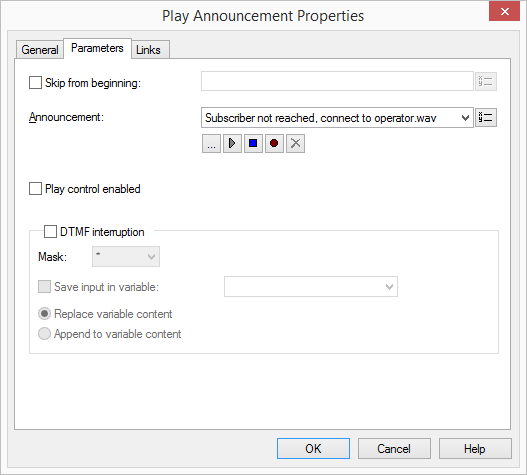
6 Then, on the “Parameters” tab, define the announcement to be played. You can select an announcement from the drop-down list, record an announcement yourself, or search for an announcement file. You can listen to the selected file using  .
.
In each block, in which the announcement selection is available, it is possible to select the "system music on hold".
7 Click on , to listen to the selected file. Click on
  to stop playing the file.
, to listen to the selected file. Click on to stop playing the file.
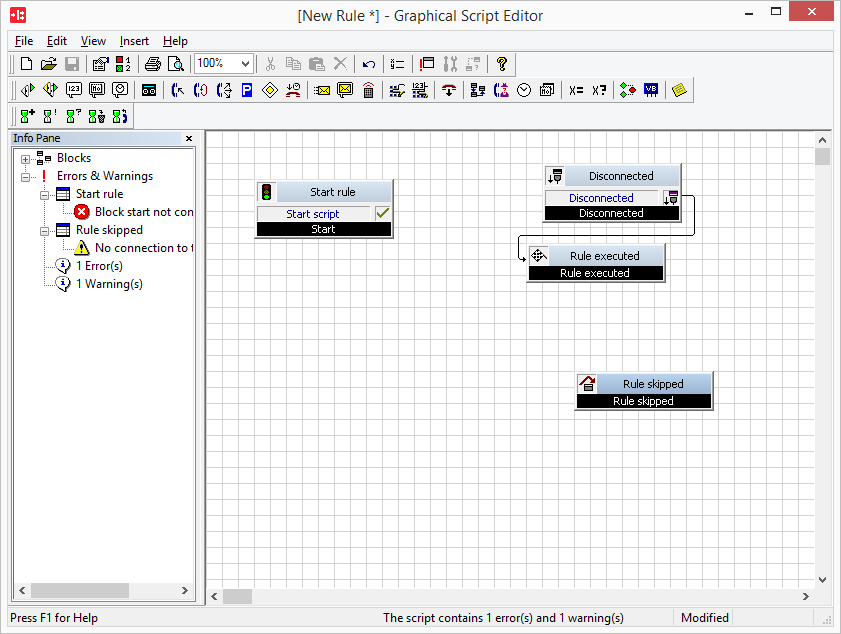
To do this, click on  by “Start rule”, keep the left mouse button pressed and drag the red line which appears to the entry of the “Welcome” block . The line then turns green, which means that a connection is possible.
by “Start rule”, keep the left mouse button pressed and drag the red line which appears to the entry of the “Welcome” block . The line then turns green, which means that a connection is possible.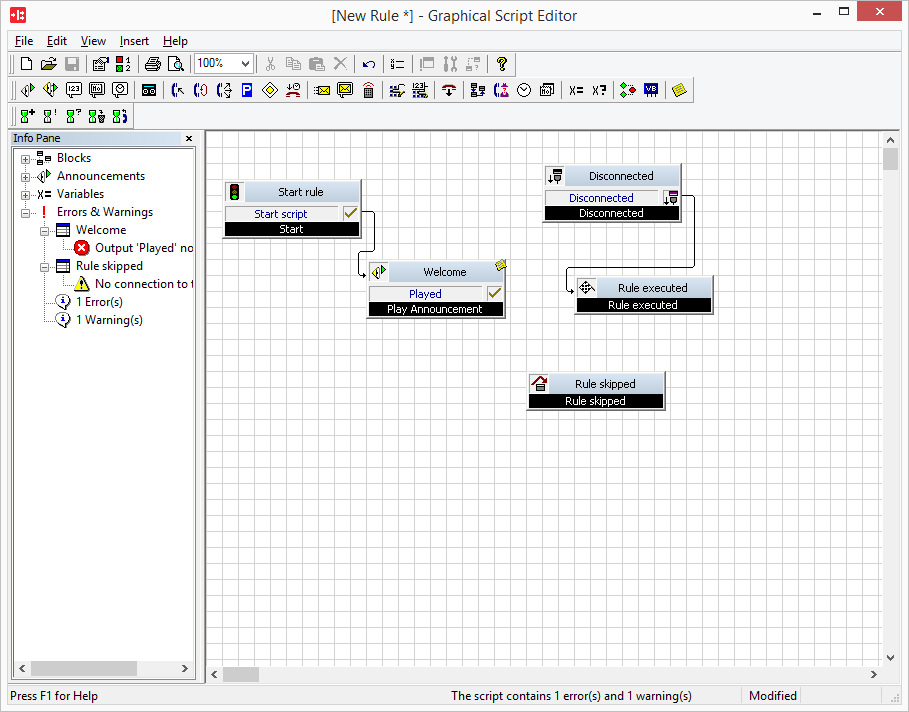
12 Now drag the second block, “Connect to”, with the help of the  symbol onto the grid interface.
symbol onto the grid interface.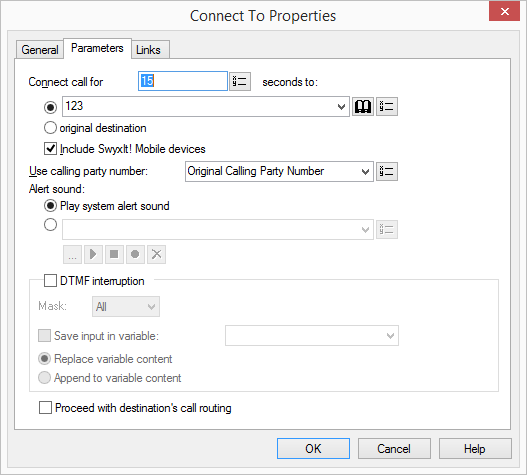
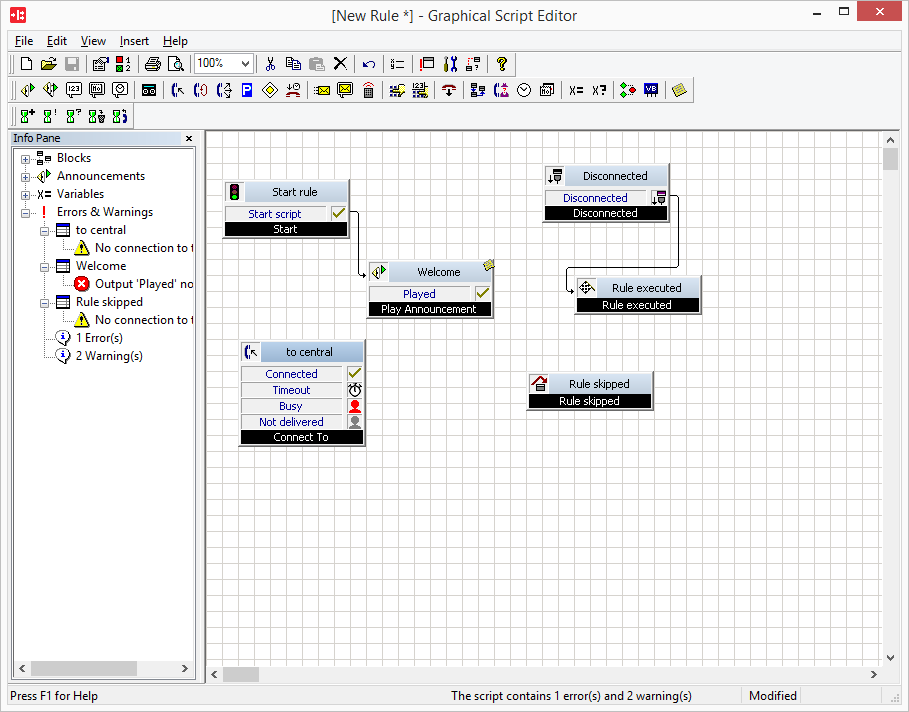
18 Now, as described above, connect the exit of the “Welcome” block with the entrance of the “To Central Office” block and its exit “Connected” to the “Rule executed” block.
with the entrance of the “To Central Office” block and its exit “Connected” to the “Rule executed” block.19 Now connect the exits “Timeout”  and “Busy”
  and "Not delivered
  " to the entrance “Skip”
  . This means, that it is possible for other rules to be applied by the Call Routing Manager.
and “Busy” and "Not delivered " to the entrance “Skip” . This means, that it is possible for other rules to be applied by the Call Routing Manager.20 Then close the Graphical Script Editor by clicking on  .
.
.
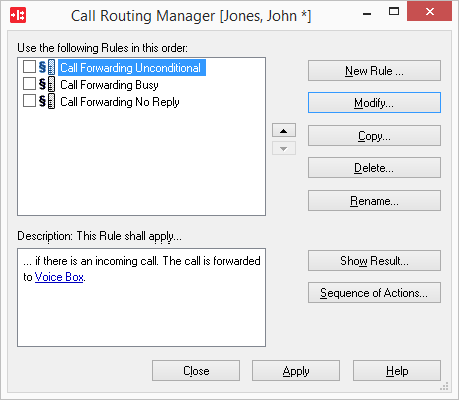
25 The "Graphical Script Editor" window will close and see in the Call Routing Manager the rule "A simple example" in the section "Use the following rules in this order:" together with the Graphic Script Editor symbol the Graphical Script Editor . There is a check mark in the checkbox in front of the rule, which means that the rule is activated. It will then be analyzed by the Call Routing Manager for call handling.
. There is a check mark in the checkbox in front of the rule, which means that the rule is activated. It will then be analyzed by the Call Routing Manager for call handling.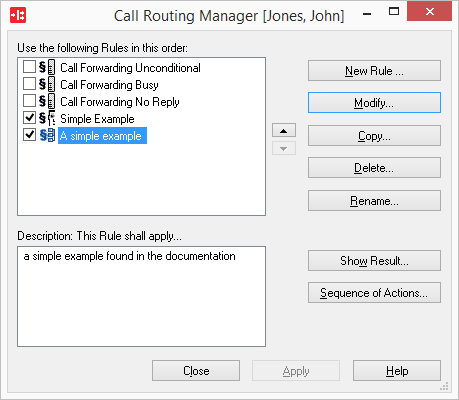
As with the rules, which were created using the Rule Wizard, you can now activate or deactivate the rules just created with the the Graphical Script Editor by clicking on the checkbox in front of the rule. The check mark in front of the rule indicates that it is active. The sequence of rules can be changed by highlighting a rule and then using the arrows pointing up or down to move the rule.
In the following chapters you will find detailed information concerning the creation of a script, extensive descriptions of the individual blocks you can add, and more complex examples.
Last modified date: 06.16.2023