Configuring a Line Button
You can define the label for each Line button individually. Since you can also have several numbers, you indicate here which of your numbers or accounts are assigned to lines for incoming and outgoing calls.
An example of an incoming call (you are being called):
You have assigned the number100 to Line1 and the number 101 to Line2. Now, if a subscriber dials the number 101, you will receive the call on Line2.
An example of an outgoing call (you are calling someone):
You have assigned the number 101 to Line2. If you now call a subscriber using Line2, extension101 will be used. The subscriber you have called will see on his display that he is being called by a subscriber with the number 101. If the administrator has configured an alternative number for you, you can select this here. It will be additionally marked as an alternative number.
The assignment of user accounts, e.g. if you have an SIP account with several providers, is similar. Here the call is handled via the provider who is assigned to the line.
To define the properties of a Line button
1 Click with the right mouse button on the Line button.

The context menu will appear.
2 Click on "Properties".
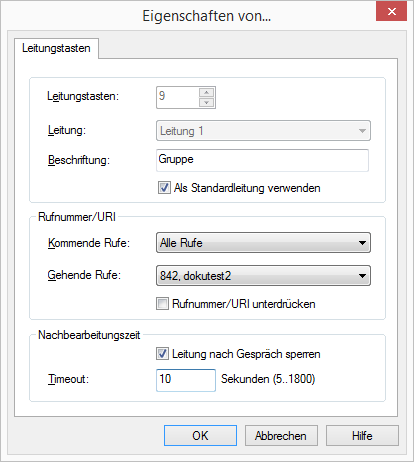
The "Properties of…" window will appear.
3 Enter the text to be shown on the Line Button in the “Label” field.
5 Click in the drop-down list “Incoming Calls” on the number(s) which should be used for this line.

All Extensions
All of your incoming calls, regardless of the number used, will be shown on this line. Group calls are not displayed.
Number or SIP account
Only calls with this number or for this account go on this line.
Example: You have assigned the extension number “ Incoming Calls" 100 to Line1. If 100 is called, then this call will come in on “Line 1”.
Group Calls Only
All group calls for the groups of which you are a member.
All Calls
All calls for your extension(s) and all group calls for the groups of which you are a member.
6 Click in the drop-down list "Outgoing calls" on the number or the SIP account you would like to use for calls from this line.
This number
will usually be shown to the subscriber called and
can be used for invoicing.
If you only have one number, this number will automatically be used for outgoing calls on this line.
7 Activate the checkbox "Hide Number/URI” if the number should always be suppressed for outgoing calls.
8 If this line should be temporarily busy (disabled) after every call, activate the option “Disable line after call”.
9 Define the time period for which this line should be disabled after a call (default value: 100 seconds).
10 Click on “OK”.
| The number of Line buttons is defined in the User Profile. There you can configure all Line buttons at once ( Configuring a Line Button). |
Last modified date: 10.19.2023