19.3 Saving Skin
You can save a skin at any time (in Normal Mode or in Edit Mode).
You can save a changed skin:
A Skin is generally saved in the form of a compressed CAB file. All the information SwyxIt! needs in order to create the Skin from the individual components (background images, buttons, and displays) are located in this file.
When a skin is saved, a preview graphic is generated which is shown when a skin is loaded. This reflects the current interface state of your skin (e.g. including your current speed dial labels). If you want to publish the skin, you should therefore save it in Normal Mode if possible, and appropriately configured.
To save a skin
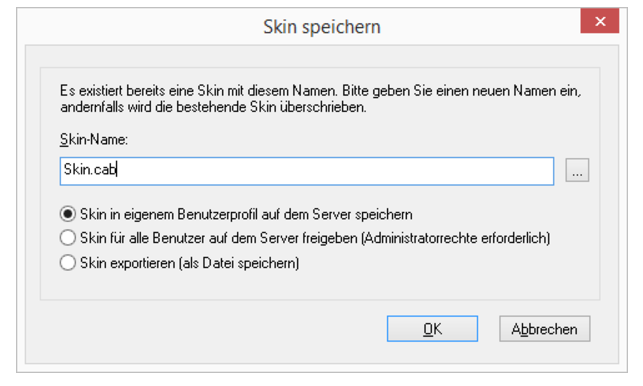
To specify a different memory location for the skin, click on the  button beside the name/location of the skin. Choose the directory you want, and enter a file name for the skin.
button beside the name/location of the skin. Choose the directory you want, and enter a file name for the skin.Last modified date: 10.19.2023