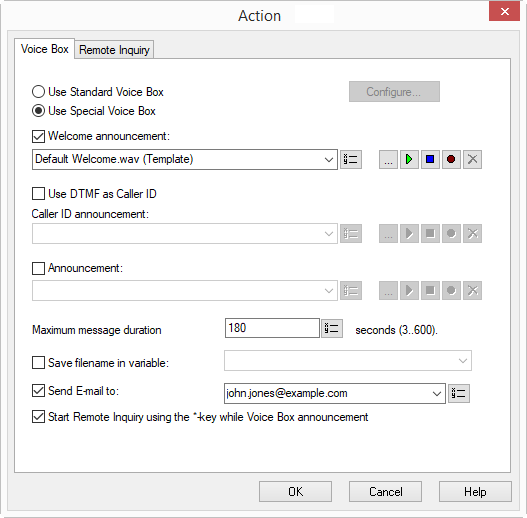
The Voice Box action connects the caller to a Voice Box you have defined for this action:
If the caller's phone number (caller ID) is automatically transmitted, it is stored with the recorded voice message of the caller. You can then return the call using this number.
If no number is transmitted, then you can ask for the number in the following manner: The caller ID announcement is played, for example, with the announcement “please dial a telephone number with your phone where you can be reached. Conclude the telephone number with the hash button”. All incoming DTMF buttons entered by the caller up to the hash button (#) will be saved as the caller ID.
1 Specify whether you want to use your normal Standard Voice Box or whether you want to define a special Voice Box (e.g. with a different announcement) for this action.
If you want to use the standard Voice Box, activate this option. You can still change the standard Voice Box here. To do so, click on "Configure…".
2 To define the text of the welcome announcement, activate “Welcome announcement”.
You have several options:

From the dropdown list select a file.
Browse your hard drive by clicking on

.
Click on

, to listen to the selected file. Click on

to stop playing the file.
To record a new announcement, click on

: You will now be prompted to enter a file name. The “Start Recording” window will appear. Click on “Start” to begin recording the announcement. Stop recording by clicking on
.
To delete the selected file, click on

.
| The WAV files, which the administrator has made available to all users, have the extension “(Template)” in the file name. These templates cannot be deleted. |
3 Activate “Use DTMF as Caller ID” in order to ask for the caller’s number if the number was not transmitted. In this case, the caller can transmit his number (Caller ID) using DTMF tones.
You can define the announcement as you did for the “Welcome Announcement”.
4 Activate “Announcement” in order to set other announcements (this only makes sense if you have already asked for the caller ID in the previous step).
You can define the announcement as you did for the “Welcome Announcement”.
5 Enter how long the caller’s message should be recorded in the field “Maximum message length … seconds” (Timeout).
6 In the "Send e-mail to" field, specify to whom the voice message should be sent.
7 Switch on "Start remote inquiry using * key during Voice Box announcement" to listen to your voice messages from another connection or to be able to change your instant forwarding remotely.
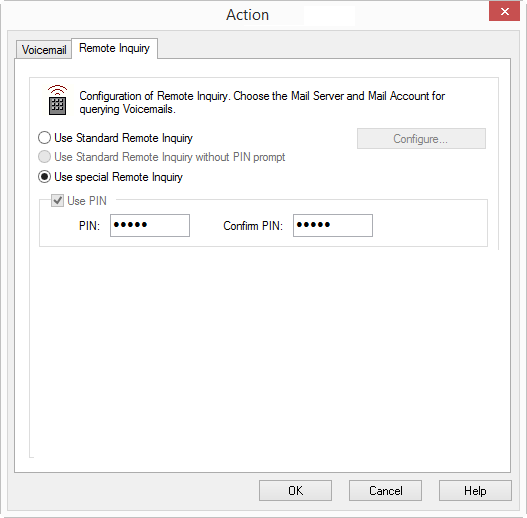
8 Move to tab "Remote Inquiry".
9 Define whether you would like to use your normal Standard Remote Inquiry (with or without PIN) or whether you would like to use a special Remote Inquiry for this action (e.g. with a different PIN):
If you would like to use the Standard Remote Inquiry, activate this option. It is still possible to change the Standard Remote Inquiry here. To do so, click on "Configure…".
The "Standard Remote Inquiry" tab will open.
If you would like to configure a special Remote Inquiry, which is only valid for this action, activate the option "Use special Remote Inquiry".
10 Define the PIN (Personal Identification Number) to be used for identification and confirm this here.
11 Click on "OK" to close the window.