Standard Voice Box
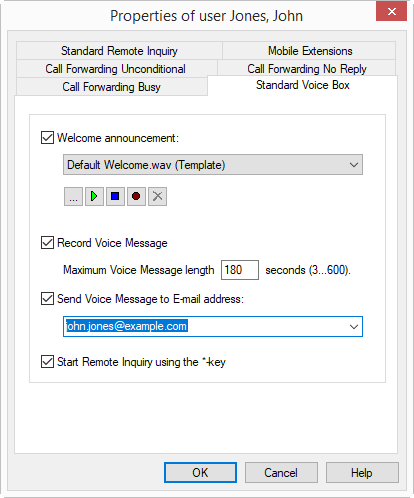
In the system rules, you can configure on the "Standard Voice Box" tab the settings of your Standard Voice Box.
You can define the text for a welcome announcement. Every subscriber who wants to leave a voice message for you will first hear this announcement. You also determine whether callers can leave a message at all and where the voice message is sent.
In addition, the Remote Inquiry options can be set here. With remote inquiry, you can, for example, listen to your voice messages from another connection or change your immediate forwarding.
The recording will be terminated
After recording the voice message, the caller can check the recording and, if necessary, re-record the message. The menu for this is played after the recording has been completed.
The parameters defined here always apply when the call is diverted to the Standard Voice Box.
The caller can cancel the announcement or the recording of a message at any time by entering a '0'. In this case, it will then be forwarded centrally.
How to configure your Standard Voice Box
 .
.Click on
 to stop playing the file.
 : You will now be prompted to enter a file name. The “Start Recording” window will appear. Click on “Start” to begin recording the announcement. Stop recording by clicking on .
 .
.The WAV files, which the administrator has made available to all users, have the extension “(Template)” in the file name. These templates cannot be deleted.
It is recommended to limit the message length, since a voice message requires a storage space of 2 to 16 KB per recording second, depending on the compression (e.g. an announcement of 14 seconds corresponds to 28 to 224 KB, an announcement of 1:21 minutes to 1.2 MB).
Last modified date: 06.16.2023