12.3.1.5 Activating DECT system
To activate the new DECT system and put all assigned DECT devices into operation, you must configure a base station.
You only need to configure the base station that you want to use as the master. The other base stations assigned to the DECT system are automatically detected.
A factory reset must be performed on the base station that you want to configure as master, see Perform factory reset.
The master base station receives the AirSync role.
Therefore, place the base station centrally and within range of all other base stations in the DECT system.
Therefore, place the base station centrally and within range of all other base stations in the DECT system.
Requirements:
- MAC address of the base station,
- Activation key,
- Provisioning-URL.
You can find this data in Swyx Control Center at Devices | DECT | DECT Base Stations | Edit DECT Base Station (). You have to activate the checkbox Show configuration info check box.
Click  to copy the corresponding data to the clipboard.
to copy the corresponding data to the clipboard. To open the administration web interface within the local network, you can also use the following line in the browser instead of the IP address of the base station: https://<Base station model>-<last three bytes of the MAC address>.
e.g. http://ipbs3-28-07-bb
The corresponding data can be found on the white label on the bottom of the base station.
e.g. http://ipbs3-28-07-bb
The corresponding data can be found on the white label on the bottom of the base station.
If you cannot open the configuration wizard, perform a factory reset, see Perform factory reset
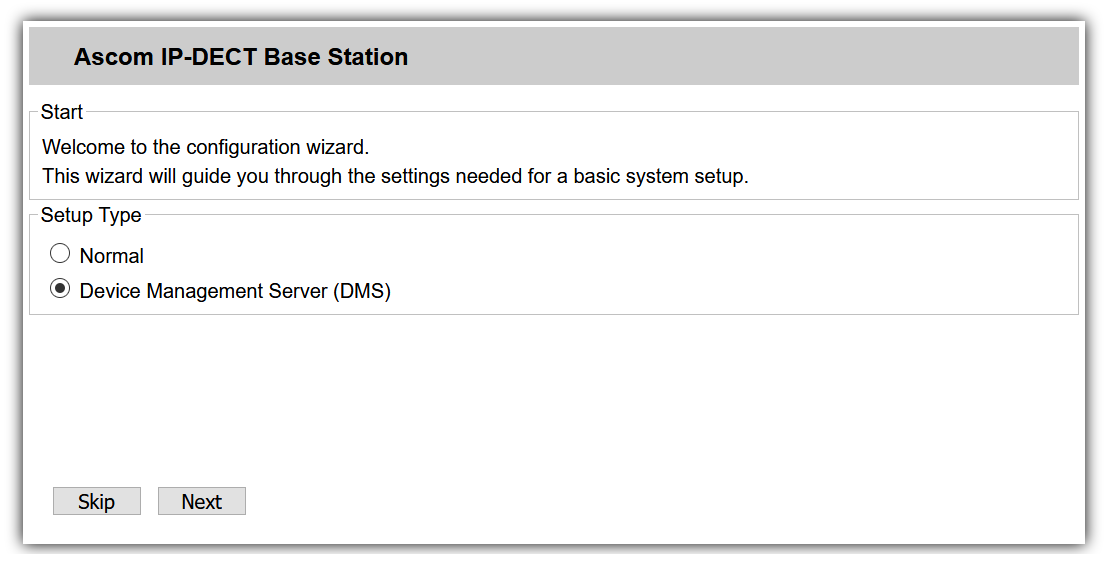
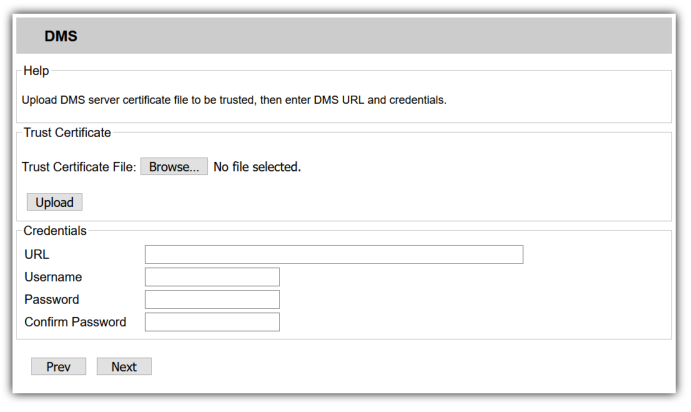
To configure the master base station
e.g. a1:c2:e3:f4:11:12
Last modified date: 01/19/2024